
It’s been decided that we are going to start blogging, and in an effort to do my part I’ve sat down and started typing. We get asked about wet-rooms all the time yet rarely end up doing them. Why? It’s pretty hard work (read expensive) to retro fit a wet room and I am not super keen to take on the liability and stress of it leaking unless the price is right. Machiavellian I know, but it’s not a job you can rush and take chances on, which means high labour costs. That leads to the question, what’s the fuss about?
Wet-rooms, when done properly, are a great solution for a boat bathroom. Sod trying to find the right size shower tray and screen then squeeze them in to place. Or, worse still, pay through the nose for a bespoke setup. Instead, put all you blood, sweat and tears in to building a fully water proof room then simply spray water everywhere with gay abandon.
I will try and go through a little of; What a wet-room is, how it’s made and what that entails, why they are a bit of a bugger but also great, and generally that sort of thing.
Let’s start with the first and last point. A wet room is a room that you can get wet…. Hm, true but unhelpful. A wet-room is a room that has been water-proofed, often to make an open plan shower, but essentially an area that can get soaking wet without any of that troublesome water getting in all the places that you don’t want it; bilges, electrics, walls etc. They are amazing as you can have a great big shower of any size and shape, use the whole room really. They’re pretty stylish and slick. They just sound cool, and all your mates will want one.
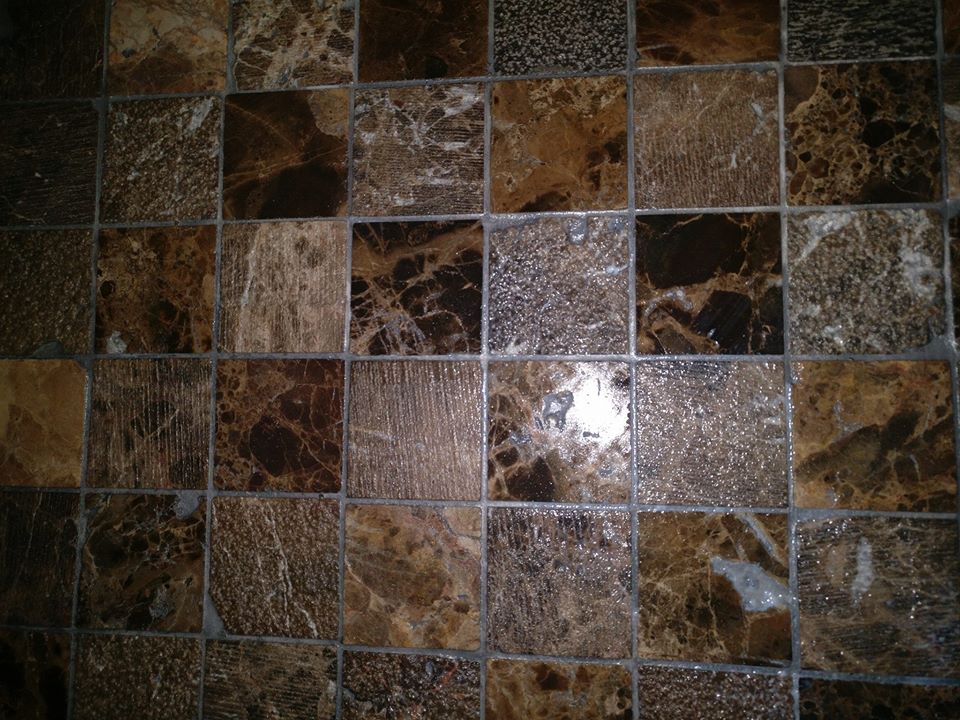
Why are they a pain? Well, beyond the fact that plumbing is always a pain on boats (household and marine plumbing systems rarely making convenient bed fellows) and you have all the usual problems of getting the required trap and plumbing under the floor in a near non-existent gap. Beyond that, you’ve got to create a room that is completely waterproof yet still have holes for things coming in and out and if you bugger it up you’ve a lot of work to do getting it right. If your tanking is no good then those beautiful antique crackle glaze tiles are all coming back off the wall, and they ain’t gonna be coming off in one piece
The water must get out, so you have to put a hole through your carefully constructed tank. You’ve got to seal all the floor and a good chunk of the wall up so good luck getting to anything that was below or behind that!
Assuming at this point a wet-room still seems a desirous and glorious addition to your boat, how does one go about it? The starting point is first fix plumbing. Get all your feeds and all the parts of the drain and pump assembly in place. Where this all is will depend on the set up, previous and desired. It’s a pain to move existing things and best avoided, but not always possible.
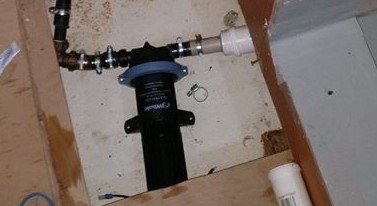
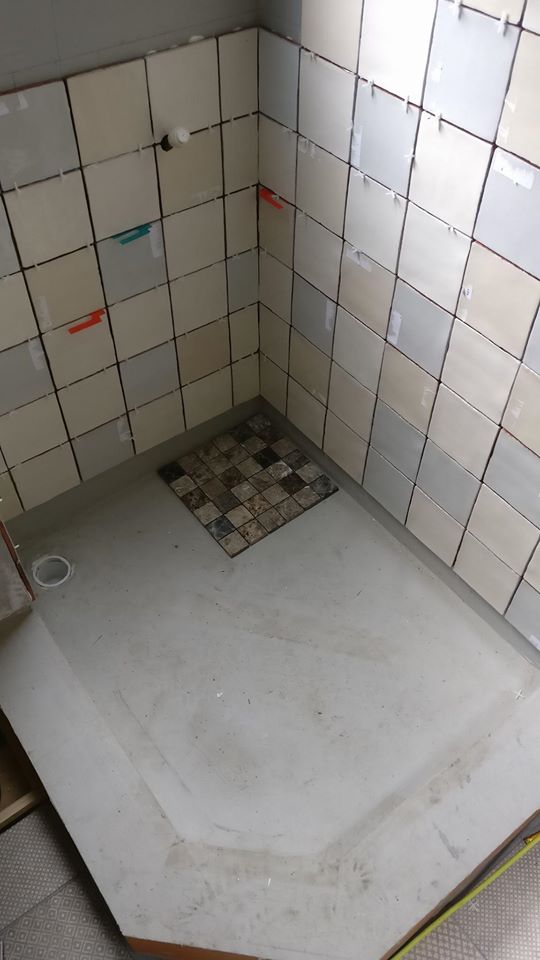
The big bit to get right is how to fit the drain. You’re cutting a whole in your waterproof floor! That’s trouble but can be worked around in a number of ways. There are formers available, these are composite boards that fit in or on the floor and can be tiled. As they have a pre made hole with a trap especially designed to go with them these are a good bet. They also have built in fall. You can make your own from scratch; ply, firrings, tanking kit and frustration (I know, I chose this path for my own boat). Or you could use an available tray but build the floor up to match. Bit of a cheat but as the ‘off shelf’ trays are so cheap they can be useful and using them to make a wet-room gets you round the fact they are always too damn shallow.
The walls will want something decent on them. Maybe you already have the walls in place maybe you have nothing there, maybe you need to move what is there. Almost certainly there’ll be things to box out, areas to square off and tweaks that are required. If putting walls in a then wedi board is ideal but a good quality ply is also a reasonable bet. Both cement board and Wedi board need a frame so you can’t beat ply for keeping it trim. I’ll let you decide if WBP, Birch or Marine is your cup of tea, I honestly think if you’re doing your tanking properly any of those three will be fine. If you are cladding existing walls then cement board was the go too, but it’s ruddy heavy. Wedi board, a relative newcomer to the market, is a great alternative. Loads lighter, similar price, cuts with a knife, it’s hard to think how we got by before it. The clouds of carcinogenic dust created by grinding through cement board make me shiver in memory.
Right, floor in, walls in, floor up again as the trap wasn’t in, floor back in, trap tested, feeds in wall for shower, sink, pump in accessible point to pump out said trap, sink waste in, great. At this point I might mention that you don’t have to use a trap and a whale gulper, but, you’ve come this far so why muck about with anything else. To my mind a sump and pump system, particularly one that uses the bilge of the boat as the sump, just doesn’t make the grade. That said, a small grey water tank with a gulper with a float is great if you want to go that far Can I endorse products on here? Yes, this isn’t the BBC, I can do what I ruddy well like. Whale gulper, Wedi board and now time for our Mapei tanking kit (edit: I’ve been trying out Topps Tiles tanking kit too and it’s not bad) , easily available from Toolstation or Screwfix for around fifty squids (or pounds, if you are at a branch that doesn’t accept sea food as currency).
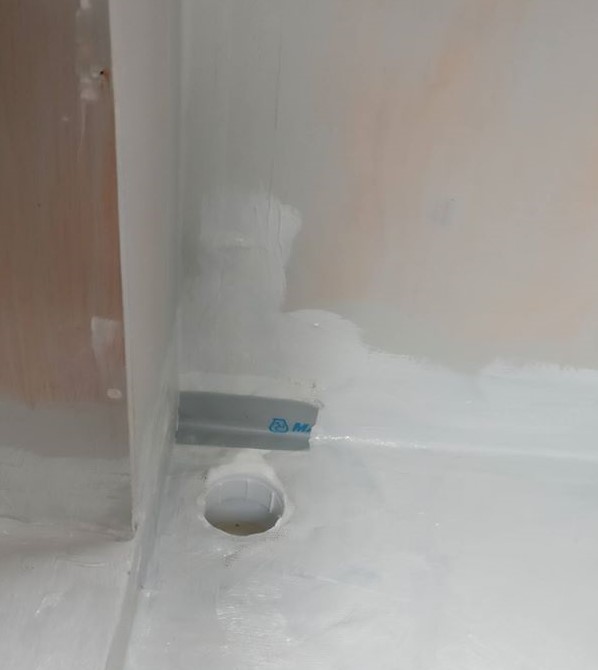
The Mapei tanking kit is pretty good. Cheaper than some rivals (Bal) and fairly comprehensive. I feel it does fall down on being a bit mean on the jointing tape they provide. I wouldn’t mind so much but as it’s £20 for an extra roll it seems a bit like a stealth tax. Anyhow, read the bucket, tape it up, gloop that liquid waterproof membrane all over the wall! Maybe this is a good point to tally up the time spent on this little project so far….
| Hours | ||
| Job | Easy | Hard |
| Surveying and Design | 2 | 4 |
| Build/Move walls | 8 | 24 |
| 1st Fix – Drain and Pump | 2 | 6 |
| 1st Fix – Feeds, shower and sink | 2 | 6 |
| 1st Fix – Sink Waste | 1 | 3 |
| Fit/Build Tray | 4 | 12 |
| Box out stuff | 4 | 12 |
| Clad Walls | 4 | 8 |
| Tank floor, tray and walls | 4 | 8 |
| Total | 31 | 83 |
People are welcome to dispute these figures. As I have pulled them completely out of the air it’s hard to say if they are truly accurate. The way I produce numbers will be a subject for discussion in an upcoming blog on pricing and project managing. I shall try and give some real world examples when we get there, but till then you are welcome to accept these figures or not. Point is, you can see that even with a fair wind and a calm sea we’ve clocked up the best part of a week, If it’s been a right fiddle it could easily be more like two.

We’re ready to tile, hooray! At this point I cross my fingers and hope I’m not going to be asked to fit metro tiles. My apologies to existing clients who have requested this, I have previously made my feelings clear so it can’t be a surprise and I am prepared to respect other people’s tastes and opinions being different to my own. For me though they are old hat, boring and dated. There are various brick tile alternatives, check out the Lampas tile range at Topp’s Tiles. They’re even on offer at the moment (no, I don’t get kick-backs). If you are DIYing then silicone can be a good way to fit wall tiles on a boat. Takes a bit longer but does a good job, is forgiving and let’s you start and stop when you please. If you’re tiling like a boss then a cement based flexible rapid set adhesive (grey or white depending on grout line, makes your life easier) is your go to. Again, I use Topp’s Tiles own brand. I find it as good as Bal and it’s half the price. Do clean your grout lines out before the adhesive goes off too hard, i.e. same day, and not with the silicone option! Take care not to damage the tanking as well. Don’t put the spacers in the actual corners of the tiles, this is truly schoolkid and should not be permitted. They stick in perpendicular to the wall and are removed after. You can thank me when you come to grout and you don’t have loads of stupid bits of plastic showing.

Another good reason to do them this way is it allows you to cheat your grout lines. It’s more important to have the lines running through well than to have a grout line that is always perfectly the same size. Not all surfaces, or come to it all tiles, are true and flat. You need to step back, check your lines and cheat them where required. I might do a ‘tips on tiling’ sometime soon. For now, when it comes to the outside wall, just remember Pythagoras!
Tiles on, get that grout in. Good, we’re really making some progress now. I shan’t dally about too much longer and we shall assume at this point that everything has been done correctly and is working. Second fix plumbing should be easy if the first fix was done correctly, if not be prepared to sweat and cry. Stick in a vanity unit. We’d make you one but, to be honest, you can get them so cheap off the internet that unless you have very specific requirements then there is very little point shelling out for a bespoke item. There are always other things to spend money on in a boat. You might still want a screen, a piece of custom glass is going to set you back a little, but peanuts compared to a full custom shower enclosure. Really though, I think we are about there. Not so bad after all. Shall we have a quick tally of those last bits
| Hours | ||
| Job | Easy | Hard |
| Tiling | 32 | 56 |
| Grout | 4 | 8 |
| Silicone | 1 | 3 |
| 2nd Fix Shower | 1 | 4 |
| 2nd Fix Vanity Unit | 1 | 4 |
| Fit Shower Screen | 1 | 4 |
| Total | 40 | 79 |
Again, we seem to have a week on the easy path, two on the fiddly one. Assuming there was no electrics and no decoration (lies, damnable lies!!!) then we’re gravy. You could have a wet-room fitted in as little as 80 person hours, or perhaps as many as 160. I won’t crunch numbers too much here as that’s another blog but you can see it’s not a quick job. You’ll also have shelled out a fair wedge on materials, though if you DIY and don’t count your own time (or frustrations) then this could be considered a cheapish job to do.
We had one client who opted to do all their own plumbing on a bathroom we did for them. Never done any plumbing before, no experience of that or any other trades, went in blind. You know what, they did a decent job. Took a little while and they had to rethink their plans at points along the way, but goes to show that if you put sufficient time and care in you can achieve most things.
Moral of all of this; Wet-rooms are awesome, they are expensive but they are definitely worth considering if you have the inclination to upgrade your bathroom. Be warned though, don’t cut corners or you’ll have made some a very expensive problem for yourself. Enjoy!
