Flawless Flooring

We’ve been doing some nice floors recently and I thought it about time I wrote something on the subject. There’s enough to say that I will be doing two posts. This one on the types of flooring on offer, and a second on tips and tricks or laying a floor yourself

                Just a quick disclaimer, as ever, that this is opinion and I can accept no liability for any choices or actions you make based upon reading this. Always defer to manufacturers recommendations. I hope you find this useful and interesting

                There’s a wide range of flooring available now, retailing at anywhere from £5psm (per square metre) to over £100psm. People will swear blind that you should use this or that, that they’d never lay vinyl or that there’s no point spending £100psm on fancy wooden engineered floors. Personally, I think all floorings have a place. I’ll go through some of the common types and why you might want to use, or avoid, them

                A quick thought about subfloor and underlay is probably worth a paragraph, before we move on.  Most flooring suppliers will tell you what underlay you require to go with the product you are using.  This may have thermal or acoustic properties, or may simply be a vapour barrier.  This will go on top of you subfloor which may be solid or suspended. What (and where, e.g. ground floor/first floor) this is will impact the type of underlay. It may also be that some work to level this subfloor is required before laying the finished floor. We’ll look at this in the DIY tips and tricks flooring post

Vinyl

                Hard to beat on price, comes in all sorts of finishes and if you can get an offcut (good for the small areas found in boats particularly) then you can get a real bargain. You’ll need a decent subfloor as vinyl brings little to the table in structural terms, but it’s very easy to lay (measure twice cut once though!) and gives a good waterproof layer. We’ve used it on a couple of jobs, not my favourite thing to work with but it has it’s place

                Pros

  • Cheap
  • Wide choice of looks
  • Water proof
  • Easy to DIY

Cons

  • Difficult to repair if damaged
  • Can trap moisture
  • Can look ‘cheap’
  • If you cut it too small when laying it is impossible to undo

Kardean

Increasingly popular Kardean flooring, this was featuring on various boats at Crick in 2018.  It’s a multi layered vinyl flooring with a high definition photo print on the top to look like stone, timber etc.  Very durable and easy to lay, I’ve laid out once and it seemed decent. I did find the click lock on the product I was fiddly at times, though this can be true of other click products. It varies with brand and quality. It’s not cheap, but if you can lay it yourself then labour may balance that out. 

Pros

  • Durable
  • Can be easy to fit
  • Very Stable

Cons

  • Relatively expensive
  • Limited finishes and styles available
  • Not much structure to it, subfloor needs to be good

Laminate

Our cupboard doors, laminate was laid by another company

Starting at around £10psm this is also a pretty economic choice. Laid well it can look pretty convincing and there are a wide range of laminate floors available to mimic all popular styles. It is a multi layered synthetic product and has a low to middling level of durability. Typically the cheap laminates are carboard with a printed wood effect on top.  Most are use a click together system for laying. If you are doing a ‘floating floor’, which most of these would be, then you need to have a reasonably flat  and level sub-floor. It is not something I have ever laid in a proffesional capacity so I have no photos of what we have laid, however there was laminate on a job where we made some gorgeous reclaimed wood doors.

Pros

  • Cheap
  • Wide Range
  • Easy to fit
  • More convincing look

Cons

  • Durability an issue with many
  • Difficult to repair is damaged
  • Soak up water and the cardboard/mdf base will swell and distort
  • Generally can only be laid as a ‘floating floor’
  • Thin structure is unforgiving on an uneven subfloor

Solid wood

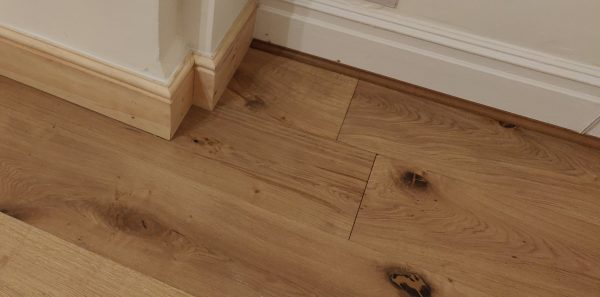
Considered by some to be the height of quality flooring, and indeed it can be.  I rarely use solid wood, for reasons I will cover, but it can be very beautiful.  Prices can be as little as £20psm but can also be over £100! Oak is popular and readily available. Exotic species quickly get very expensive, though not as. We have done some lovely reclaimed floorboard floors.  Be aware this is a more skilled and labour intensive way to do flooring than buying a pre prepared ‘off shelf’ product.  Bamboo should perhaps be included here, but I will cover it separately.

If you are buying a ready made flooring then this will likely be tongue and groove. It can laid in various ways though I would tend to opt for a floating floor to allow for instability in the material.  A decent subfloor and a good underlay are  important.  Glue in the grooves will stick the whole floor together in to a large floating raft.

        Pros

  • Attractive finish
  • Generally good durability (less so softwoods)
  • Can be re-finished if damaged
  • Can be quite economic, some oak boards are really good value

Cons

  • Can be quite expensive
  • Solid wood can be unstable (boards may expand and  contract)
  • Harder to lay
  • Needs acclimatising before being laid

Engineered Flooring

This is my main go to, along with bamboo. Especially for boats where stability is a factor. There are widely varying qualities of engineered flooring and this is reflected in the price. The best are a birch ply with a decent (4mm+) wear strip of the chosen hardwood on top. It’s this cross laminated structure (you could call an engineered floor a laminate floor, but they are generally regarded separately) that gives you such excellent stability.  The best boards can cost more than their solid wood equivalent. 

This stability means you have  a wide choice of fitting methods with the floors; floating, glue together, glue down, hidden nail. Some can be laid straight to joists (this is true of most solid wood floors as well) if desired. 

At the cheaper end of the spectrum are boards made of softwood block board with a thinner  (2mm+) veneer on top. These are excellent value and can look great, but won’t be as durable in the long run. Most of the engineered boards come pre finished, oil or lacquer, though the higher end luxury/exotic veneers are often left bare for finishing after laying.

        Pros

  • Very stable
  • Can be fitted in lots of ways
  • Wide range of woods and finishes
  • Can be refinished when damaged
  • Generally very good durability

Cons

  • Tend to be the most expensive, certainly for quality boards
  • Need acclimatising before laying
  • That’s about it, it’s a really good flooring!

Bamboo

Full disclosure, when I first wrote this post I’d not tried bamboo and had included it as footnote in solid floors. Since then I’ve laid, personally and as a company, quite a few bamboo floors and have come to hold them in high regard. Truth be told, it’s a frequent go to!

Price wise a good quality bamboo comes in a similar bracket to a mid to low quality engineered board. Around £30psm gets you a decent bamboo board. They are very durable, harder than oak and arguable more stand. There differences in the manufactur of bamboo, e.g. strand-woven, solid and engineered, but I won’t go into that here.

The variety of finishes and colours, these are added to the natural light bamboo colour, give it good range. It doesn’t look like wood, but I think it has a pleasing aesthetic of it’s own. There’s also the added bonus of it’s relative sustainability, though please do research this yourself if it’s an important factor to you. I’d be interested to hear people’s knowledge on this.

Pros

  • Relatively economic
  • Durable
  • Sustainable
  • Can be refinished
  • Stable

Cons

  • Can be fiddly cutting
  • Hardness wears tools
  • Definitely doesn’t look like wood (if that’s what you really want)
  • Needs acclimatising

Tiles

I will cover tiles here very briefly, I write in greater length about tiling in other blogs and they really are a topic in and of themselves.  Tiles are attractive, durable, stable and available in range that replicates, or is replicated, by the various other floorings covered here.  We do a reasonable amount of tiled floor and it is great for boats. The main downside is that it can be a bit chilly, but this can (not so readily on boats that aren’t on shoreline, but fine for houses) remedied with underfloor heating. There are very reasonably prices electric kits available for under tile.  Another downside can be cost, which may be quite high if a lot of remedial work is required before laying tiles. That said, they come in a range of budgets and can be laid DIY fairly readily

Pros

  • Durable
  • Stable
  • Can be cheap to buy and install
  • Wide range of styles
  • Can be DIYed to good effect

Cons

  • Can be dear
  • A good subsurface is required
  • Potentially chilly underfoot

Finishes

Let’s finish on finishes.  This is largely solid, engineered and bank floors, you don’t want to varnish your vinyl! The finishes available on boards are likely to be as good, or better, than you can achieve yourself. It doesn’t save much to get them unfinished, it’s really the high end exotic boards that you would buy unfinished. Also, if you want a very specific finish then you might do this, but by and large you will buy finished boards. It also means you can walk on them straight away and you aren’t stuck watching varnish dry trapped in the corner of a room and unable to get out (certainly not a personal anecdote, I swear!)

With pre-finished boards you’ll often get options on board and finish. First off you can choose plain, distressed or brushed (brushed is where they brush the timber with a metal brush, it helps highlight the grain texture).  Then on this you can choose an oil or a lacquer, both of which can come in a variety of sheen levels.  A two part lacquer is the most durable finish, if you want to just put it down and ignore it then this is the finish for you. Oil is beautiful and is easy to reapply should the floor be showing signs of wear and tear.  It’s six of one and half a dozen of the other. More durable but hard to refinish, less durable but easy to redo.

Some extra blurb

Whatever floor you choose, if you are thinking of laying it yourself then I am hoping to have a Dan’s DIY tips for flooring that I shall be publishing soon. Watch this space

I’d also like to mention that one should read price per square meter with the understanding that you’ll need more than just the boards themselves. The addition of trims, thresholds and various sundries can be 50-100% that cost again

It’s a S**t job (but someone’s got to do it)

Hey, today we’re going to talk toilet tanks.  Jacqui (our business bod) has been asking me to write a post on this for a while so while I’m sat in an Uber on my way to a job seems like a good time. I wouldn’t normally afford myself the luxury of an Uber but it’s so expensive to drive a van into central London and park, plus my bike is temporarily out of action, so I thought why not. 

                Taking a toilet tank out is an ever popular request from people.  We do take some out, though many people opt to do it themselves.  It’s not that tricky but it’s a dirty job and I, for one, expect a pretty decent rate  before I start going mano a tanko with your old poop tank. Well, for those that fancy saving a few quid and trying it themselves I will try and impart a little wisdom.

                Standard Disclaimer; We take no responsibility for any work you choose to undertake. While I hope this will be of use to people anything you read here is purely personal opinion and you should not undertake any work where you do not know what you are doing. If in doubt get a professional!

                There are few elements to tank removal and a few types of tank that you might be removing. Let’s start by breaking the job down. There’ll often be access issues, walls or beds and the like that have been built in after the tank so some preparatory carpentry is likely step 1.  Step 2 will be to decommission any plumbing that is in your way (Do not mess with gas pipes! Get a gas safe professional!).  Next up, step 3, that’s free the tank and wrestle the bugger out of the boat.  You could also include disposal here though we aren’t covering that as commercial waste removal is not our area, we pay for this to be done safely and legally. Step 4, make it good and install your new choice of toilet

                From the top then.  People want to hide tanks out the way and use up dead space. Building the bed over the tank is a classic way to utilise space and hide away the unpleasant tank.  Often the tank will be sticking halfway through a wall as well.  How to remove these potential obstacles is not a question I can answer completely here, a good knowledge of boat carpentry will stand you in good stead but, failing that, I would suggest a considered approach of deconstructing what is there. Try to work out how it (whatever it is) was built and work back from there.  If you take it apart carefully then you’ll likely be able to put it back together again.  It’s common on boats for fixings to be in some way accessible. It could be that there are trims holding the walls in and the screw holes have been filled or plugged. Find these and dig them out. Just work through whatever is there, finding points where it is fixed and removing them. It’ll take longer than crowbarring the whole lot out but you’ll thank yourself later. A handy tip is to take a photo log of the work as this can help reassembly

                Before we go any further, let’s look at a few different tank types. If you’re lucky, it’s a modern plastic tank. Pat yourself on the back as the battle is already half won.  More likely it will be a metal tank, old, rusty and possibly structurally unsound.  This might have brackets or fixing points so that it could be screwed down to the base. It may have straps to hold it in. Or, if you really have p****d off the gods of good fortune, it may be welded to the base or even be an integral part of the hull.  If it’s the final one, you’ll know once you have uncovered the tank in full and can see the bottom of it. You have a horrid job ahead of you. For now we’ll assume an independent tank and I’ll talk about integral tank later.

This tank was just stupendously large

                Okay, let’s look at decommissioning the tank. We ask people to empty the tank (obvs!) and to rinse it out at least twice before we start. This won’t leave it completely clean or empty, but it’s better than it could be.  Next up is any plumbing involved with the tank, plus anything else in the way.  Turn off your water, ideally at the pump and stop cock, drain the pressure off the system at a low point or tap and disconnect you water feed.  This can then capped with a stop end and you’re good to go. Temporarily decommission any other plumbing (don’t touch gas! Get a Gas safe plumber!) in a similar manner if required. 

The loo will be attached to the pump either directly or via a pipe. You will want to turn off and isolate the macerator if there is one.  There will be a an in-let, out-let and air vent on the tank (set ups may vary and other in/out-lets are possible, check manufactures drawings if in doubt but things are largely all dealt with in the same way). Basically, disconnect and remove all all pipework at both ends and then we’ll deal with the holes. For this we’ll want some batten, board, silicone and spray foam.  Little holes you can spray foam, bigger holes we’ll board over. You want to cut a length of batten about 4” longer than the hole width. Put this in to the tank and hold in place so it is covering the width of the hole. Drill a hole through either side where the wood is to allow you to put a couple of screw in, hey presto you’ve now got a fixing point.  You can now cut a piece of board that is going to cover the whole. It needs to be bigger that the hole but the exact measure is not important.  I like to glob a load of silicone around the  edge and then I just screw through the board (eg a scrap of OSB, chipboard or WBP, ply) in to the batten and the silicon is going to seal up the hole. It’s not going to give you a perfect seal but your not going to hold the tank upside down above your head! (I hope)

Now that the tank is sealed up, holes large and small are covered, we can look at getting the tank freed up and out.  Assuming it isn’t integral then it is likely fixed somewhere, either by straps or brackets or similar.  If there is something to undo, hopefully undo that and you’ll be good to go. More likely whatever fixings are in place will be rusted to hell and will want grinding away. I wouldn’t recommend drilling out screws in the bottom of your hull! Grind off heads, cut, remove or snap straps, check that all fixing points are loose. If it’s a metal tank, then it may be quite rusty and this could be gluing it to the base. Get a bar under there and lever it up to break it away, being cautious that the hull is sound underneath, you don’t want to rip a hole in the floor of your boat!

If it’s plastic it will likely come away easily and should be quite light to lift out. If it’s metal then it’s probably going to be trickier, you also should watch out for the integrity of the tank. Handle with care as if it’s rusted then you don’t want it to collapse on you! It’s also going to be heavier so you’ll need an extra pair of hands to help lift it out. 

Integral tanks….. Well, some days you’re the statue I guess.  If the tank is welded to the hull/part of the boat, then the only way you are going to get it out is to cut it out. You may have to cut up the tank anyway if it’s just too large and/or unsound. That’s every bit as unpleasant as it sounds.  Clean, rinse and pump out as best as you can, then get in with the grinder. Extreme caution must be taken!! Do not cut a hole in your hull.  I would suggest you cut open the top and then wet vac out the remaining liquid, after that mop out the residue.  At least this way there’ll be less splashback as you cut in! You only need to cut away what’s above floor height, though you don’t want to leave a pool in the bilge. Point is though that if it’s not clean down to the hull all the way around it hardly matters. Take your time, cut out manageable pieces, and just be very, very careful. Using a grinder in a tight space is dangerous, use appropriate personal protective equipment. You really need to watch out for sparks as well, they start fires bilges and on clothes!

Once your tank is out and you’ve taken it to an appropriate waste disposal site then you can put the area back together. Refit plumbing and carpentry elements as required, patch sub-floor and floor, walls etc.  Cassettes and compost loos are generally pretty easy to install, so now you’ve done the hard bit this should be pretty straightforward. All that’s left after that is to burn your clothes, have three to four showers (round at a mate’s house) and enjoy your new crapper!

Happy tank removal

Spongy floors and rusty bilges; a thankless task

I often get asked if we can come and replace or repair a patch of floor. Typically, something like, “Oh, there’s just a small spot that has gone a bit spongy. Just needs cutting out and a new bit sticking in. Could you help?”

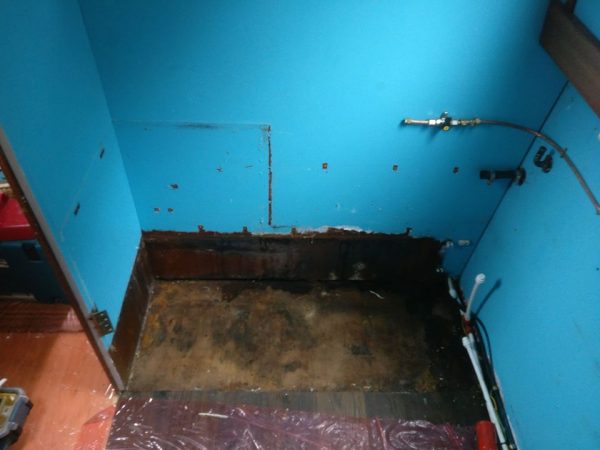
                This always sets alarm bells racing. Why is a bit of the floor squishy? What is causing it, and worse, what is now underneath? It would indeed be a small job to cut away a little bit of board and replace it, but this is rarely what is required. It is more often the symptom of a much more problematic situation, one that I shall try and give you some advice on dealing with in this post

                The reason that this is often such a costly job is not because of any great skill required in dealing with it, but because it is often a very widespread issue that will require a lot of time to resolve. Potentially moving (removing) many items and carrying out a lot of grotty and lengthy works. If you want to DIY it, you can save a packet. The work involved, for the large part, is not too taxing, just time consuming

                I shall break this down in to a few sections in order to make this guide as useful as possible. Each section will contain an outline, some suggested steps, and some tips and tricks on dealing with what you may encounter. They will be,

  • Finding the issue
  • Preparing for the work
  • Sorting the bilges

Standard Disclaimer; We take no responsibility for any work you choose to undertake. While I hope this will be of use to people anything you read here is purely personal opinion and you should not undertake any work where you do not know what you are doing. If in doubt get a professional! All boats are different and anything written here should not be taken as universal

Finding the Issue

                The first question when anybody says there is a problem with damp is where is the water coming from? This may seem daunting, but there are only so many places that it can be coming from and we can trouble shoot our way through. We are assuming here that your boat is designed with a dry cabin bilge.  If it is designed to be wet then water in the bilge will not be as useful of an indicator, though depending on certain known factors, like the weather, you may still learn something if the level of water is changing when not expected to. 

                For now we’ll assume that you’ve lifted some boards in the effected area and/or lifted inspection hatches (typically found hidden away in corners, sometimes beneath furniture) at the stern of the boat) and found water beneath.  If there is a particular wet area, beyond just the bilges at the stern, then searching locally for the leak is going to be a good starting point. Water will run ‘downhill’, so things nearby or in front of this wet area are likely culprits. 

                You might be wondering, is the water coming from the canal? Short answer, probably not and if it is then this is not the guide for you. If your hull is unsound, or you suspect it may be, get your boat out the water and get a professional to advise you. It is rare that this is the case if you’ve had a survey, though we have been working on a boat that has sprung a leak! If it is possible to pierce the hull with a scraper or the like, then the hull needs professional attention.  As such, let’s just discount this for now until you have excluded all other possibilities

                Is it coming from the plumbing? This is one of the major causes of a build up of water. It can often lie unnoticed and rot away timbers and rust bilges unseen until the problem has gotten much worse. An understanding of water systems on boats will help you track down issues here, but we will run through some potential areas that it could be

                Water comes from your tank and is then put under pressure by a pump. Any utility using water will be connected to this pressurised system so we can tell if there is a leak between pump and outlets as the pump will come on when there is nothing being used.  So, pump running when it shouldn’t be equals a leak in the  ‘live’ side of the plumbing.  Once you know this, then it’s a case of tracking it down and fixing it.  It’s more often a joint than a straight run of pipe so check any connections.  Pipes, particularly copper pipes, can split if left full and allowed to freeze in cold weather as well, though this would probably cause a more noticeable leak than just a slow drip. 

                It could be the water is escaping from somewhere after this. Typical things to check are shower and sink wastes. This might be identified by damp or mould local to one of these. Drying thoroughly and then running water through with a paper towel beneath will allow you to check for minor drips. Any joints in pipes running from these should also be check, with particular attention paid to anywhere there is negative fall as water will sit here and have more chance to work it’s way through any weak points.  The skin fittings on boats are another week point. Integral welded steel outlets on older boats may have rusted through with time, this happened with the shower on my boat, a late 90’s cruiser stern

                If in doubt you can eliminate the plumbing completely by isolating it (or draining it) from the boat and seeing if the problem persists. If it does then this would suggest that the water is coming from outside the boat.  Again, we are assuming that this is an above the waterline issue.  Is the problem worse in wet weather? Then it’s probably coming in through a weakness somewhere in the shell.  The ‘weak points’ are anywhere the shell has been cut through, in particular, windows, mushrooms, chimney collars and other vents and outlets.  Doors and doorways could also be to blame.  Rust, damp or mould down the wall beneath the cladding might lead you to the offending article.  It is worth giving the exterior of the boat a thorough visual inspection. I have also known water to get in from wet bilges, such as an engine bilge, when bulkheads have rusted through to the cabin bilge. While I am not going in to detail on how to fix the multitude of issues you might discover, I will perhaps cover some in future blogs, I will give a shout out here to ‘Captain Tolley’s creeping crack cure’. This can be a handy fix for certain hairline gaps on boat exterior, at least for a temporary fix. 

                I feel I should also mention condensation. This gets put forward as a source of water in the bilge and can be a problem, though I have not seen many cases where condensation is creating a significant build up of water.  It shouldn’t be completely disregarded, but I would look for other culprits first unless you have a lot of bare and uninsulated shell beneath the cladding. 

Preparing for the work

                You’ve found and fixed you’re leak.  Now you need to assess the damage and decide on a course of action. You should be able to dry the bilge, and have it stay dry. If not, then you may still have an issue.  It could be that you have an area of flooring/woodwork that has been affected and a rusty bilge.  How much should you do? It is tempting to want to pull everything up and start again, but this may not be practical. Factors such as, how accessible is the bilge, the age and value of the boat, the state of internal fitout, the severity of the damage/mould/rust will guide you as to how much is worth doing.

                Rust looks awful, 1mm of steel becomes 10mm of rust! When you first look at a bilge that has gotten wet it can be quite frightening.  If you are in doubt, then seek professional advice. A surveyor will be able to help you gauge what is problematic and what is just cosmetic.  Mould should be dealt with as this can be bad for the health and residual damp and mould can affect surrounding woodwork. 

This boat was overplated, this is severely rusted!

                If there is relatively little in the way of fitout and bulkheads it may be simple to lift everything for access.  If the opposite is true you might find it very difficult to lift boards which are pinned down by walls, kitchen, bathroom, tiles and all sorts of fitted furniture and the like.  Perhaps you can cut out the rotten area and replace, then deal with the rusty bilge locally and at the stern.  If the rust is not too bad, you can possibly just dry out the bilge and trust that it will remain relatively dry in the future so that the rust will not significantly increase. 

                Ideally you want to remove all rotten wood and clean, treat and paint any rusty sections of bilge (and walls of the shell if effected).  In extreme cases this can mean removing the boats fit-out completely. If this is required then a dock with covered storage is the best situation, but it might be possible to deal with half a boat at a time and do it this way while on the cut.

                If there is extensive remedial work to do then it is often as quick, and probably more sound, to remove whole panels of wall and floor and replace them. Cutting bits out and bodging them back in will likely leave a creaky floor and messy looking boat. Not to say it can’t be done, but by the time you have done a proper job of cutting out a piece of flooring, patching it and making good you may have been able to just take out the bulkheads and lifted the whole lot. This also makes it easier to support the flooring properly. I will cover floors, sub floors etc in more detail in other blogs

                We are mostly dealing with bilges here, though the same techniques can be applied to other metal elements of the shell, so I will leave the woodwork to one side.  The flooring, and subfloor will want to come up and then any ballast will need lifting. It is difficult to really get a bilge bone dry until anything is removed and it is fully exposed. Even then, if there are thick layers of rust this can trap a lot of moisture.  You will want to dry out ballast before putting it back in, unless it’s pea shingle in which case bin and replace with slabs! Care should be taken when removing a boats ballast.  Narrowboats are inherently pretty stable (wobbly, but unlikely to capsize), but do be aware that moving/removing ballast may affect your boat and it’s position in the water

                Top tip: If you are going to remove sections of the fit-out, take lots of photos and notes while you do. It is easy to forget how everything went together when you come to put it all back later on

                Sorting the Bilges

                By this point you should have full access to all the areas you want to deal with. Like I have said, we are discussing the metal work here. Some of the carpentry elements you will find dealt with in my other blogs, but the spectrum of work is too wide to cover here satisfactorily. 

                I would mention again, rust can look much worse than it is, but if you are unsure of the integrity of the hull then seek professional advice.  The next step is to physically remove as much rust as possible.  Rust is an oxide of steel and is unusual in that it flakes away from the surface of the metal where many other metals’ oxides adhere to the surface. Take for example aluminium, a highly reactive metal that is protected by it’s oxide coating. Sadly, this is not the case with steel and rust and you will want to remove as much off the loose rust as possible

                For DIY purposes I would suggest starting with giving the entirety a good going over with a scraper and then sweeping up the loosened rust. Be aware that dealing with the rust is probably the messiest bit of the whole job and you should take care to wear appropriate PPE, including but not limited to goggles, mask, and probably a boiler suit. 

                If the area effected is large and the resources are available, then it may be practical to mechanically remove the rust with a needle gun or with blasting. It is best to seek professional advice if you want to do this so that you can be advised on the suitability of these techniques. 

                Once the area has been scraped over then it will need a thorough brushing with a stiff wire brush. This can be a hand brush or a drill attachment, either way it’s dusty, horrible work to do so masks on! Sweep away whatever comes off and hopefully you will have a surface that is beginning to look a little less shocking.     

                You won’t be able to remove all the rust (unless blasting of course) so the next step is very important and should not be skipped.  A rust converter should be used on the entire surface. There are a few different products and it is to be noted you will likely want to order these in advance from the internet as they are not readily available in shops in useful quantities (you might try Halfords and Toolstation, but better to go online).  Fertan and Vactan are both popular, though check whether the product you are using needs washing off after application as this adds an annoying and, I feel, unnecessary step.  My personal favourite is FLAG rust converter and primer as this can be painted on and left and leaves a primed surface ready for topcoat. 

                All of these converters work in the same way, they change the red oxide into a black oxide which is stable and will remain stuck to the steel. Don’t ask me the science of it, I am sure that is available elsewhere on the internet.  The idea is that you want a stable surface to apply your new finish too, otherwise rust underneath your paint might damage the surface and lead to water being able to penetrate and further rust the metal

                You could stop at this point, but I feel if you have gone to all the trouble then why not future proof it?  You aren’t going to want to get back in the bilge any time soon and if you put a decent topcoat on then you will have a much better level of protection should you have any leaks in the future.  My personal choice is Manor Coatings Zinfos 340 WS. You can get this online or from many auto-motive paint suppliers. It is one-part primer topcoat with a anti-corrosive. I like to think of it as Hammarite for grownups. It is cheaper and can be mixed to any colour, so why not. I like a light cream or grey, so that you can easily see oil, rust or any other issues in the future, but whatever floats your boat (if you’ll pardon the pun)

                Two coats of Zinfos 340 and your metal work should be fairly bomb proof (not literally mind).  After this you are all set to replace the ballast and begin rebuilding/re-fitting the innards of your boat.  Assuming you have taken things out with care and have good records of how it went together then this should be a relatively pain free exercise. You’ll likely be replacing your subfloor in part if not in whole, exterior grade ply here is fine but some people like to be belt and braces and stick in marine grade. This is fine, though it is pricey and very heavy. 

                Well, you’ve finished. You might not be able to see you’re handywork but now you can sleep soundly knowing that you’ve done a proper job. Why not relax from your hard days labour and check out some pictures on our Instagram feed or see some of our projects on our website. Until the next time

Ta Ta for now

Big Bucket, Little Bucket, Little Dry Bucket

Winter is setting in and boaters are gathering round to exchange stories and news. If you’ve spent anytime on the water or with boaters then you’ll know that sooner or later, generally sooner, the topic turns to toilets. 

                It’s one of the favourite questions of Gongoozlers as well, ‘how do you go to the loo?’, right up there with ‘does it get cold in the winter?’.  Well, having just decommissioned a pump-out ready for a compost loo I thought the time ripe to write a few words on it.

Just a quick disclaimer, as ever, that this is opinion and I accept no liability for any choices or actions you make based upon reading this. Always defer to manufacturers recommendations. I hope you find this useful and interesting

                There are three main types of loo; pump-out, cassette/porta potti and compost. Or, as I like to think of them big bucket, little bucket and dry bucket.  Within these main categories there is further subdivision in both attribute and application but these three are the basics of what you’ve got, ‘in privy terms’. Please note ‘sea’ toilets are not legal for use in British inland waterways and are not covered here

Big Bucket

                A pump-out is a big ole tank (some bigger than others as pictured right, a monster we removed recently) and a toilet, either on top or separate. The latter generally requiring a macerator in order to make smooth the passage (yes, that is my level of humour) of waste to storage point.  If the tank is on top of the tank you don’t have a macerator, it can just drop straight through. The tank will have chemicals added to it to keep smells etc. in check. The particular concoction best suited is a much discussed topic, shows what happens when you don’t have a telly

Plus

  • Big capacity
  • Empty less often
  • Closest resemblance (with some models/set ups) to a traditional toilet
  • Requires little heavy lifting, the pump does the job

Minus

  • Carry a big weight of waste around, can cause a boat to list
  • You don’t want to have one that’s rusted through on the tank
  • If you can’t find a working pump-out point (in London, shocker!) then you may be holding it for a while
  • Pay £10-15 each time you empty it, plus a little smelly
  • Relatively expensive and complex system

All in all, they can be very convenient and, if used with an auxiliary backup, e.g. porta potti, then they are a good choice if in good nick and well maintained.  Unpleasant when they go wrong mind.

Little Bucket

This can be a cassette or the classic camping/caravan porta potti. It’s what it says on the tin.  A bucket with chemicals; toilet blue, toilet green, toilet pink, even biological detergent has been known to work.  Various formats make it seem more or less like a bucket/real loo but in essence it’s pretty simple.  When you’re full you just remove the tank and take to an elsan to empty

Plus

  • Relatively cheap system cost
  • Simple to operate
  • Not much to go wrong with it
  • Only ever carrying a small amount of waste

Minus

  • Small capacity
  • Heavy lifting, some 20kg of poop and wee, to empty
  • Quite smelly to empty

You can get spare cassettes and cassettes with wheels which alleviate some of the negatives. It’s still much smaller though and you may find yourself encouraging friends to wee in the hedge when they come to visit.  Most boat owners in general, but particularly those with a cassette, take a pleasure in managing to use a loo while out and about, be it pub, restaurant or a friend’s house. 

Dry bucket

A compost loo. The idea here being that poop if kept dry does not smell (edit: some people advocate a ‘one pot’ system and I can confirm that, having smelt one, these can be low odour as well)  All the urine is separated off, there are various ways of achieving this, and a small amount of sawdust is added each time to keep it dry and odour free. When full the solids are removed and left to compost until they are a safe and useful soil improver.  There is debate as to how smelly or not they are. With all systems a lot is down to how it is maintained and used, and this is no different.  There are passive and active systems, but the simplest is a bucket with poop and sawdust

Plus

  • Simple systems are very cheap
  • The products can be used in agriculture and/or disposed of more readily
  • Large capacity, presuming the urine is separated and emptied often the dry part can go a long time
  • Potentially no need to use smelly elsan or pump-out points

Minus

  • More up market systems can be quite expensive
  • Relatively long composting time to produce ‘safe’ end product
  • Urine still needs to be dealt with (where does boater wee go…..)
  • Some heavy lifting of full tank
  • Requires more balancing and TLC to get a well functioning system

They can be the highest or lowest of toilets, from fan assisted externally vented sci-fi toilets, to bucket and dust privy.  They are certainly gaining popularity amongst boaters and can be a good, reliable and green system if used well

I can’t tell you what toilet is best, it’s more discussed by boaters than coal brand, water heater type and whether a trad or cruiser stern s best all rolled in to one.  I do know that whatever type of toilet comes with a boat half of boaters want to change to something different. It really depends on the individual needs of the boater.

It can be reasonably economically to swap out a system if DIYing, though this can involve a fair amount of knowledge, quite a bit of brute force and, last but not least, potentially having to deal with somebody else’s old waste tank, yuk.  On my boat I have a porta potti, though I am planning to proto-type a compost loo in the new year (edit: we now sell a range of compost toilets, please contact us for info. I will be adding a shop to the site in coming months).  Whatever system you have and whatever system you want it can be, it’s a dirty job but someone’s got to do it